2. Edit the map (crop/rotate/add walls/add unknown area)
convert map.pgm map.png edit map.png using any photo edit tool (photopea.com)
convert map.png map.pgm
3. Edit map.yaml file to set the robot origin
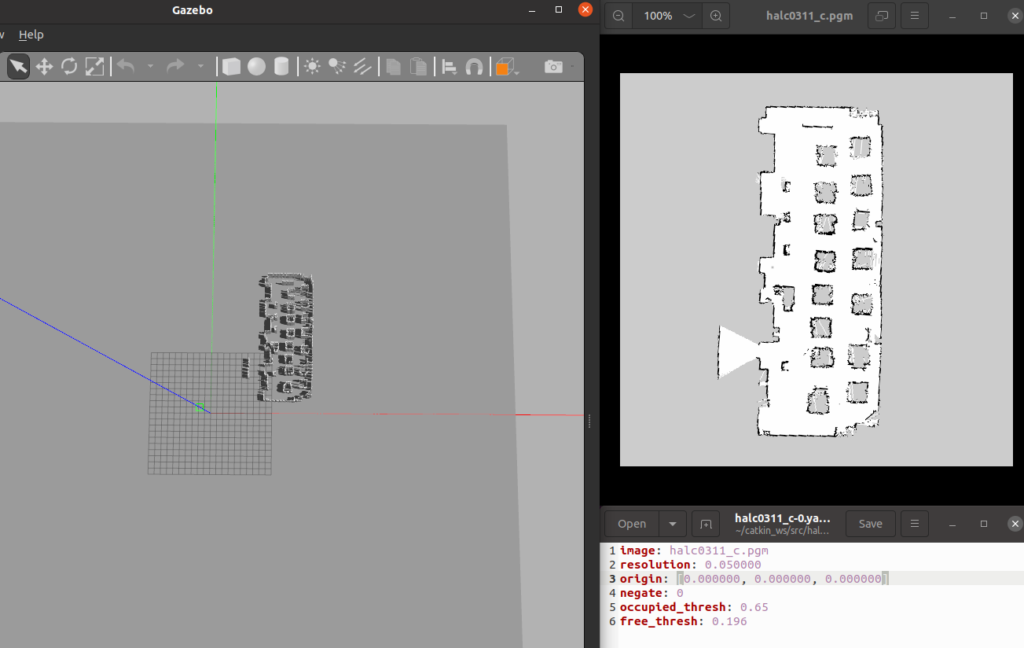
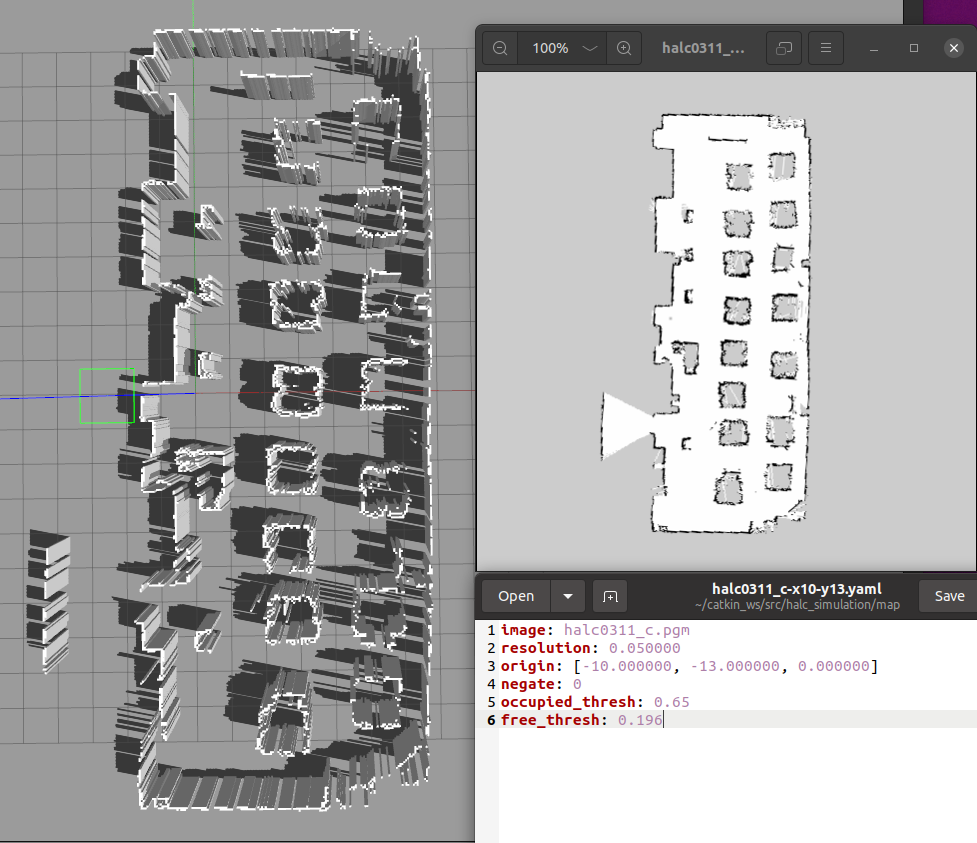
first set origin: [0.0, 0.0, 0.0], the bottom left of the map will be set to center in the rviz.
One grid equal to 1 metre.
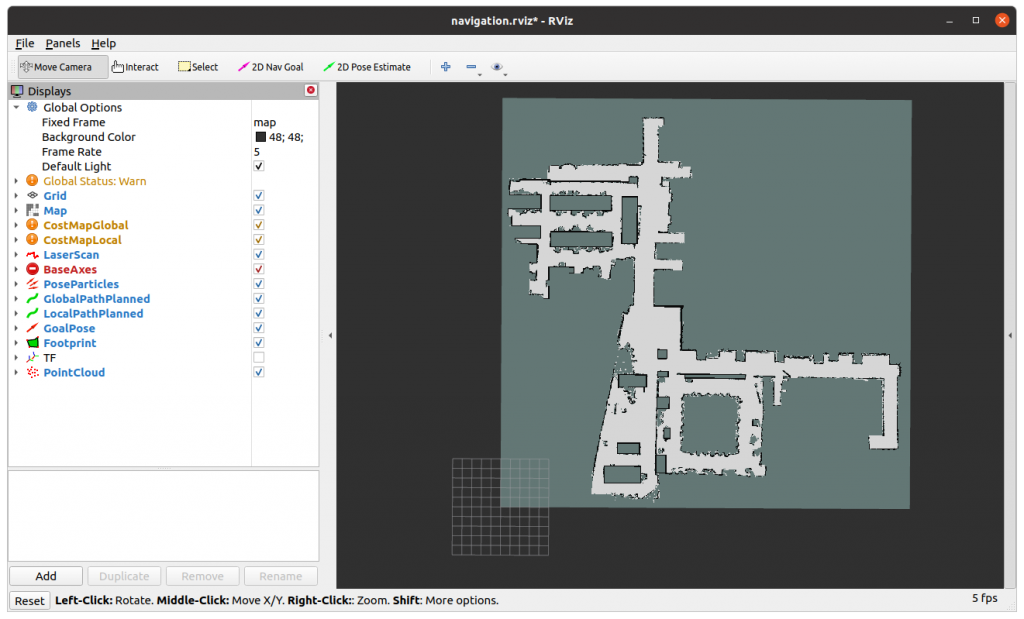
Run rosrun rviz rviz -d navigation.rviz to open rviz.
Run rosrun map_server map_server cmc7f_202504.yaml to load map.
Update yaml file, Assign x = -5.0 will move map to the left, y= -5.0 will move map down.
The center of 10×10 grid is the position where the robot spawn.
Save yaml file, and load the map again to update origin position in rviz
4. Run map_server to load map
rosrun map_server map_server cmc7f_202504.yaml [ INFO] [1766297469.674219814]: Loading map from image “cmc7f_202504.pgm”
[ INFO] [1766297469.679488601]: Read a 850 X 850 map @ 0.050 m/cell
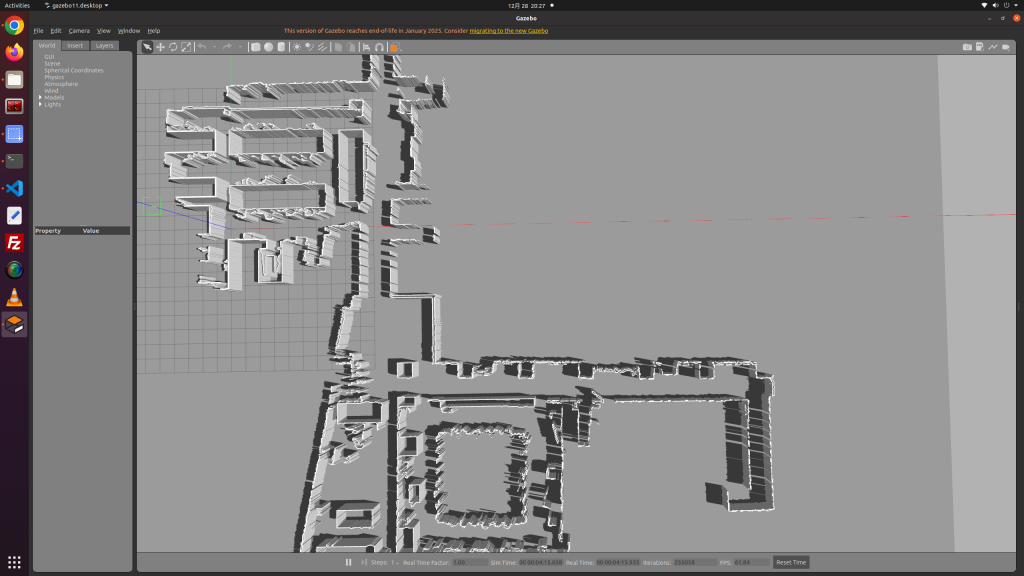
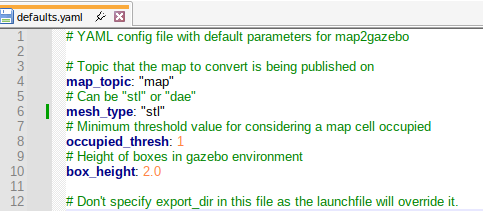
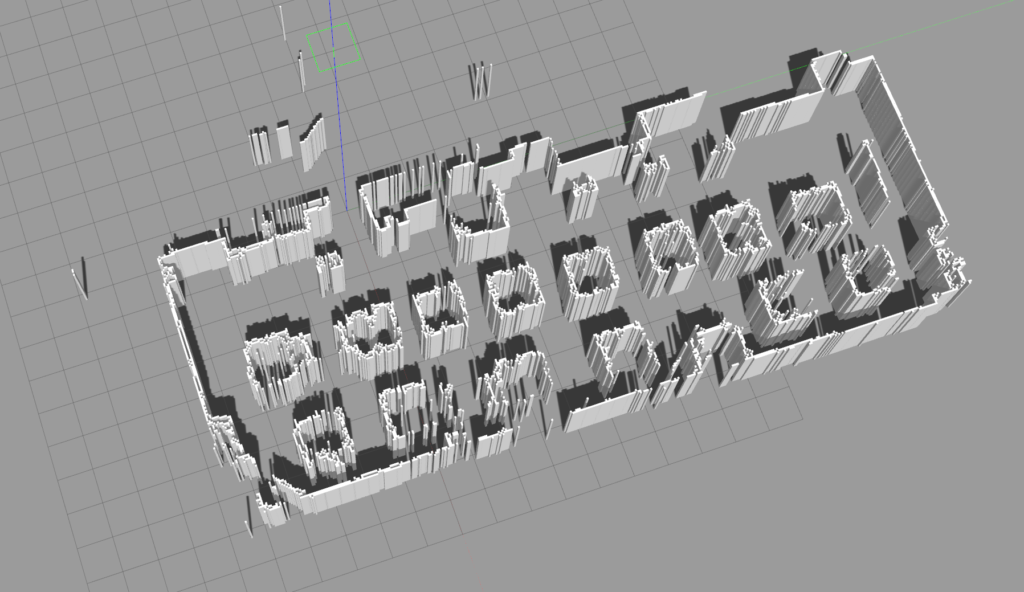
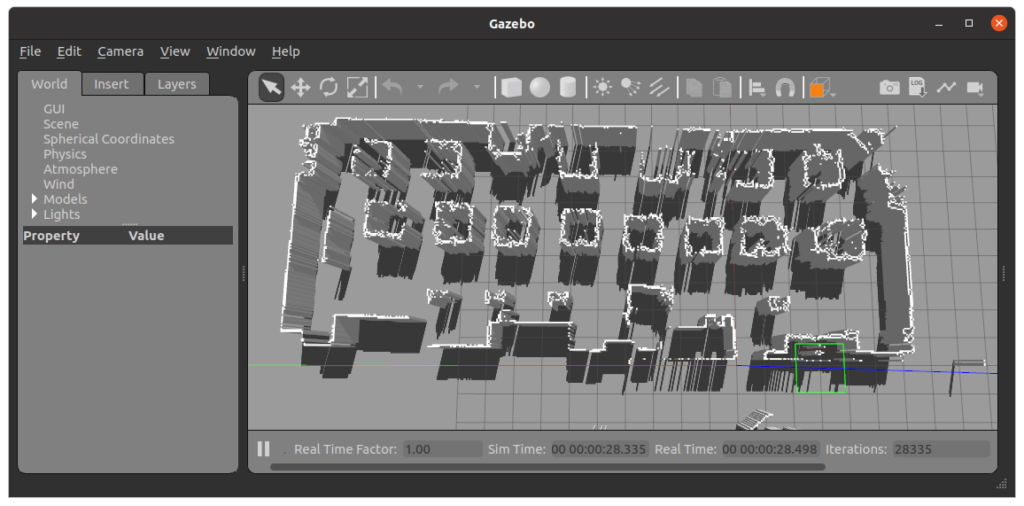
5. Run map2gazebo.launch to create a model from rosmap
roslaunch map2gazebo map2gazebo.launch params_file:=$(rospack find map2gazebo)/config/defaults.yaml [INFO] [1766297467.412934]: map2gazebo running
[INFO] [1766297469.685248]: Received map
[INFO] [1766297481.411006]: Exported STL. You can shut down this node now
6. Run gazebo_world.launch, then File -> Save World As -> map_7f.world roslaunch map2gazebo gazebo_world.launch
7. Copy .world file and folder ~/catkin_ws/src/map2gazebo/models to destination
8. Create a launch file that read load the model folder and .world file
why I feel want to eat something while I read a difficult article
ChatGPT said:
That’s actually a pretty common brain–body response, and it comes down to how your mind handles effort and stress.
When you read something difficult, your brain shifts into high cognitive load mode — working memory, attention, and problem-solving all spike in activity. This can trigger a few things:
Energy demand signal – Your brain runs almost entirely on glucose, and although reading doesn’t burn a huge amount of calories, sustained mental effort feels like an energy drain. Your body interprets that as a cue to refuel, making snacks suddenly sound appealing.
Stress coping – Challenging reading can activate a mild stress response. Many people unconsciously use eating (especially sweet or crunchy snacks) as a comfort or grounding mechanism.
Reward-seeking loop – Struggling with a hard text can feel frustrating. Eating activates your brain’s dopamine reward system, which can momentarily offset that discomfort — so your brain learns: “This is tough… snack time!”
Habit association – If you’ve often eaten while studying or reading in the past, the mental strain might automatically trigger that old habit, even if you’re not physically hungry.
If you want to test whether it’s actual hunger or just a mental coping cue, you can try pausing for a moment and drinking water, stretching, or doing a 2-minute unrelated task before reaching for food — if the craving fades, it was likely brain-stress, not fuel need.
Here’s a compact 2-minute “in-flow craving reset” you can do without leaving your seat:
Minute 0–0:30 — Hydrate & Acknowledge
Take a few slow sips of water or tea.
Mentally note: “I’m not truly hungry; this is just a brain craving.”
Minute 0:30–1:30 — Micro-movement & sensory shift
Roll shoulders, stretch neck, wiggle fingers.
Adjust lighting or glance outside for a quick visual reset.
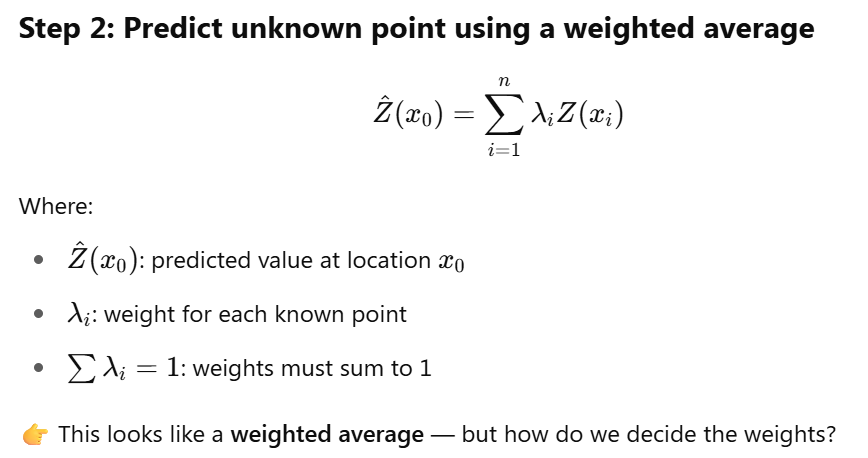
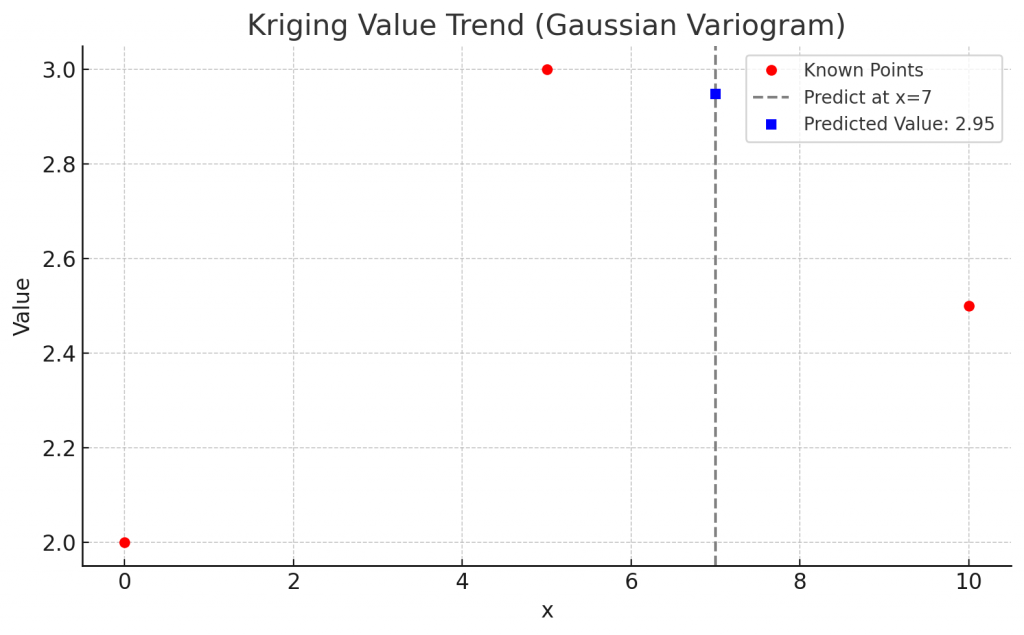
I’m working with this recently. It was use to interpolate the unmeasured data in environment. I asked chatgpt to explain the algorithm for me.
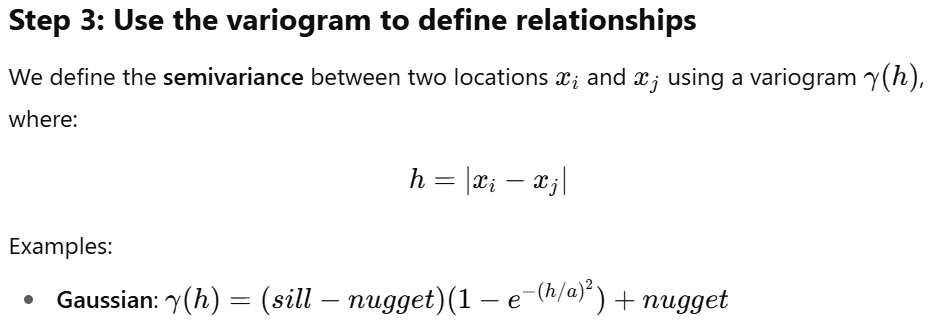
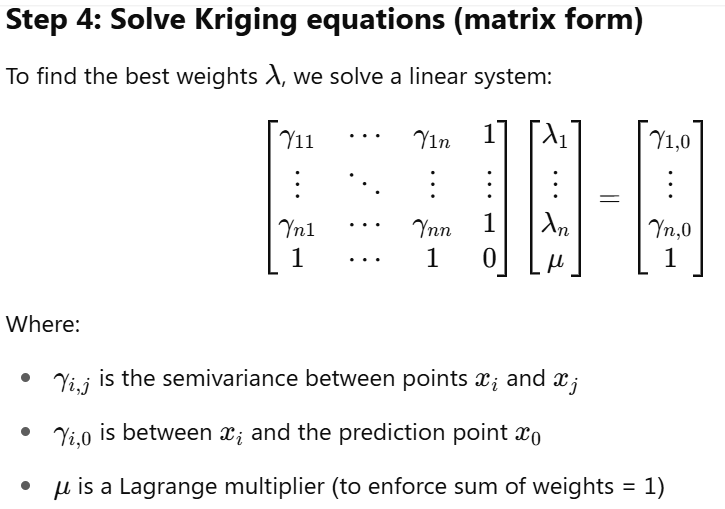
How are the weights chosen? Kriging looks at – Distance: closer points are more relevant – Spatial correlation: how similar nearby points tend to be (modeled by a variogram)
The variogram describes how values “change” with distance. For example: If points 1 meter apart are almost always similar → strong correlation If points quickly become unrelated as you move away → weak correlation
from pykrige.ok import OrdinaryKriging
OK = OrdinaryKriging(
    x, y, values,
    variogram_model='gaussian',
    variogram_parameters=None,
    nlags=6,
    weight=True,
    enable_plotting=False,
    coordinates_type='euclidean'
)
z, ss = OK.execute('grid', gridx, gridy)
z[z < 0] = np.nan   # post-process results by masking negatives
variogram_model: controls how spatial correlation decays including linear, power, gaussian(default), spherical, exponential variogram_parameters = {‘sill’: 0.8, ‘range’: 10, ‘nugget’: 0.1} nlags: controls how many lag bins are used to calculate the experimental variogram. More bins is more smoother fitting, but slower. If weight is True, It weight the variogram fitting by number of point pairs per lag. coordinates_type -euclidean: x, y in linear units (e.g., meters) -geographic: lat/lon in degrees Execute option: grid for mesh, points for specific locations
#If you want even more control (e.g., kernels, noise, trend), use GaussianProcessRegressor:

from sklearn.gaussian_process import GaussianProcessRegressor
from sklearn.gaussian_process.kernels import RBF, WhiteKernel, ConstantKernel

kernel = ConstantKernel() * RBF(length_scale=10.0) + WhiteKernel(noise_level=0.1)
gpr = GaussianProcessRegressor(kernel=kernel)
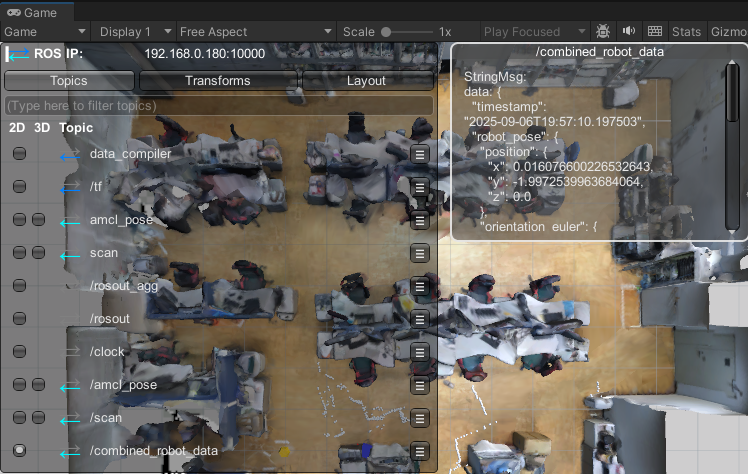
rosrun halc0311_simulation turtlebot_move_spawn_write.py (this program is somehow so slow)
don’t know why the robot is so drift left/right when command moving forward.
Thinking a better way to generate the waypoints…..
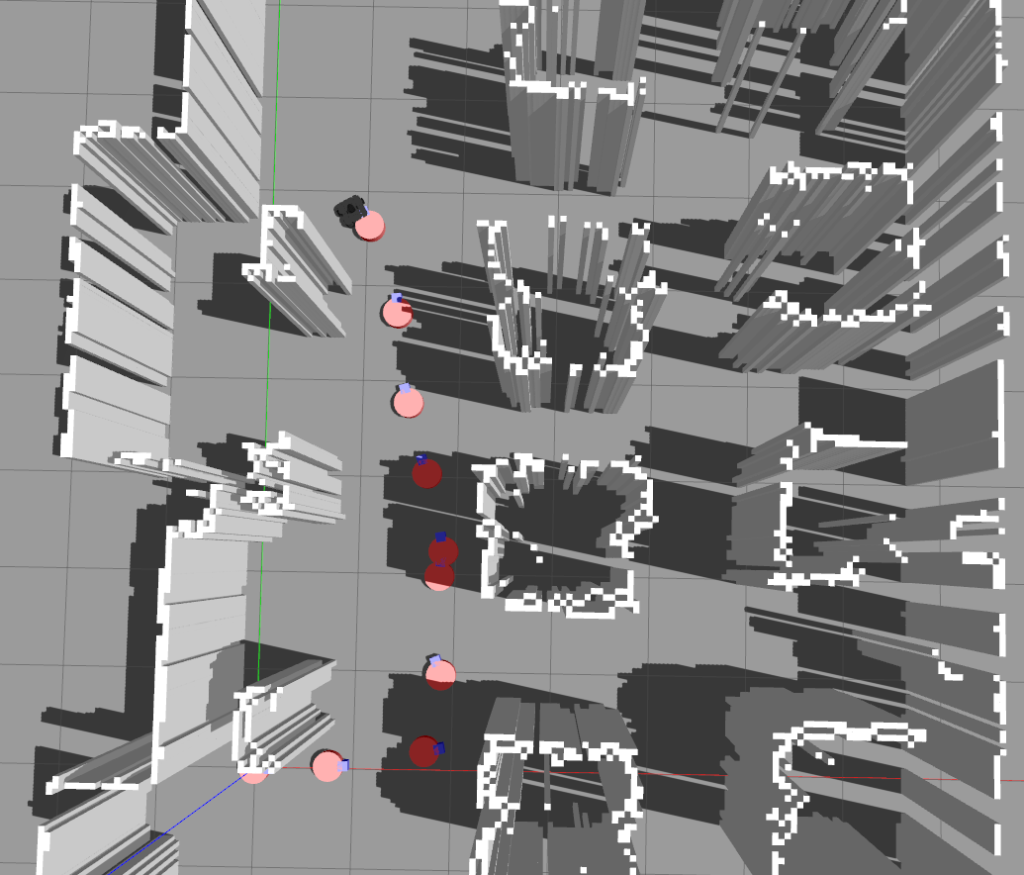
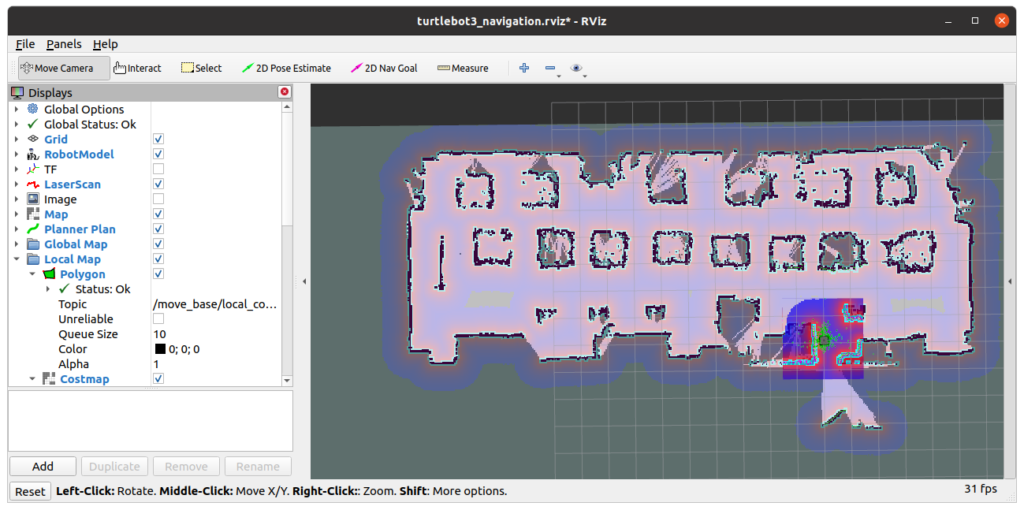
default turtlebot costmapafter reduce threshold on costmap
#1 run gazebo of simulation map
roslaunch halc0311_simulation turtlebot3_gazebo_halc.launch

#2 run amcl navigation (rviz) reading a scan map
roslaunch turtlebot3_navigation turtlebot3_navigation.launch map_file:=$HOME/catkin_ws/src/halc0311_simulation/map/halc0311_c.yaml

# for keyboard control
roslaunch turtlebot3_teleop turtlebot3_teleop_key.launch

#3 save current amcl pose (waypoint) to a file and mark a waypoint on gazebo
rosrun halc0311_simulation recorddraw_goal2digit_onefile.py

#4 read the waypoint file and let the robot move along the waypoint
rosrun halc0311_simulation megarover_sequence_goals.py goal_sequence_20250316_161024.yaml

# cancel navigation goal
rostopic pub /move_base/cancel actionlib_msgs/GoalID -- {}
run keyboard or mouse
rosrun teleop_twist_keyboard teleop_twist_keyboard.py // not work
roslaunch turtlebot3_teleop turtlebot3_teleop_key.launch  //ok
First we need to install these libraries pip install –user trimesh pip install –user numpy pip install –user pycollada pip install –user scipy pip install –user networkx
2. Several errors
[ERROR] [1741507226.788502]: bad callback: <bound method MapConverter.map_callback of <__main__.MapConverter object at 0x7fd8238e8f40>>
Traceback (most recent call last):
  File "/opt/ros/noetic/lib/python3/dist-packages/rospy/topics.py", line 750, in _invoke_callback
    cb(msg)
  File "/home/zotac-d05/catkin_ws/src/map2gazebo/src/map2gazebo.py", line 30, in map_callback
    contours = self.get_occupied_regions(map_array)
  File "/home/zotac-d05/catkin_ws/src/map2gazebo/src/map2gazebo.py", line 72, in get_occupied_regions
    image, contours, hierarchy = cv2.findContours(
ValueError: not enough values to unpack (expected 3, got 2)
ValueError: not enough values to unpack (expected 3, got 2)
process[map2gazebo-1]: started with pid [29285]
[INFO] [1766289078.421279]: map2gazebo running
[INFO] [1766289078.432847]: Received map
[ERROR] [1766289080.632500]: bad callback: <bound method MapConverter.map_callback of <__main__.MapConverter object at 0x7f5e2d288100>>
Traceback (most recent call last):
  File "/opt/ros/noetic/lib/python3/dist-packages/rospy/topics.py", line 750, in _invoke_callback
    cb(msg)
  File "/home/zotac-d06/catkin_ws/src/map2gazebo/src/map2gazebo.py", line 43, in map_callback
    mesh.export(f, "stl")
  File "/home/zotac-d06/.local/lib/python3.8/site-packages/trimesh/base.py", line 2931, in export
    return export_mesh(mesh=self, file_obj=file_obj, file_type=file_type, **kwargs)
  File "/home/zotac-d06/.local/lib/python3.8/site-packages/trimesh/exchange/export.py", line 101, in export_mesh
    result = util.write_encoded(file_obj, export)
  File "/home/zotac-d06/.local/lib/python3.8/site-packages/trimesh/util.py", line 2171, in write_encoded
    file_obj.write(stuff.decode(encoding))
UnicodeDecodeError: 'utf-8' codec can't decode byte 0x89 in position 81: invalid start byte
Change open function variable from “w” to “wb”
    if mesh_type == "stl":
        with open(export_dir + "/map.stl", 'wb') as f:
            mesh.export(f, "stl")
        rospy.loginfo("Exported STL.  You can shut down this node now")
    elif mesh_type == "dae":
        with open(export_dir + "/map.dae", 'wb') as f:
            f.write(trimesh.exchange.dae.export_collada(mesh))
3. You can select output between stl or dae
~/catkin_ws/src/map2gazebo/config/defaults.yaml
4. The export directory was set to $(find map2gazebo)/models/map/meshes” if there is no this folder, it will say the error…
roslaunch map2gazebo gazebo_world.launchrelationship between pgm image and the yaml original setting that reflect gazebo worldyaml adjustment
Then, File -> Save World As halc.world hence you will get the current camera pose. copy the models folder to the package where you copy .world to
zotac-d05@d05:~/catkin_ws/src$ catkin_create_pkg halc_simulation
Created file halc_simulation/package.xml
Created file halc_simulation/CMakeLists.txt
Successfully created files in /home/zotac-d05/catkin_ws/src/halc_simulation. Please adjust the values in package.xml.
zotac-d05@d05:~/catkin_ws/src$ cd halc_simulation
zotac-d05@d05:~/catkin_ws/src/halc_simulation$ mkdir -p worlds launch
zotac-d05@d05:~/catkin_ws$ catkin build
roslaunch halc_simulation gazebo_halc.launch
Creating a world with turtlebot (this method load map.sdf, unable to adjust the camera pose, just save the world via gazebo is fine!)