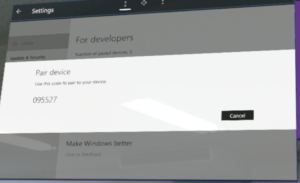
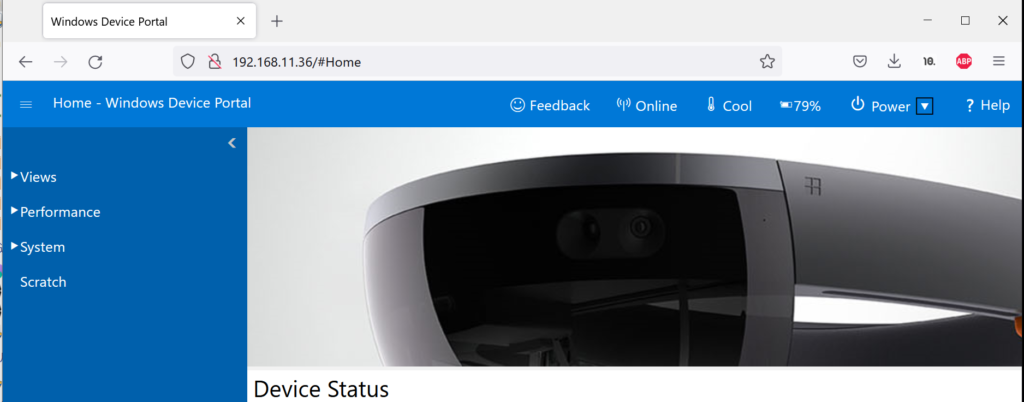
I refer from http://talesfromtherift.com/hololens-contest-week-9/
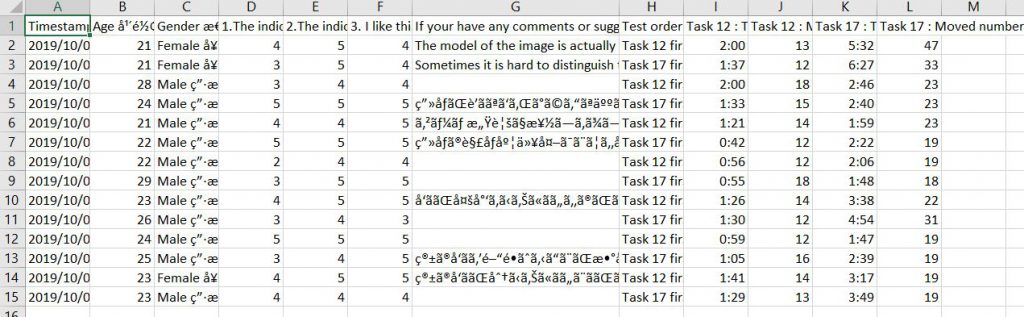
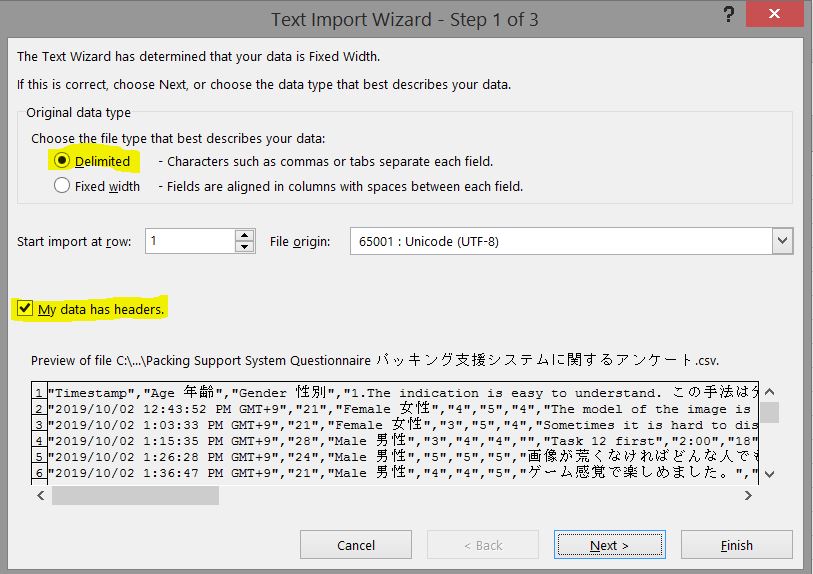
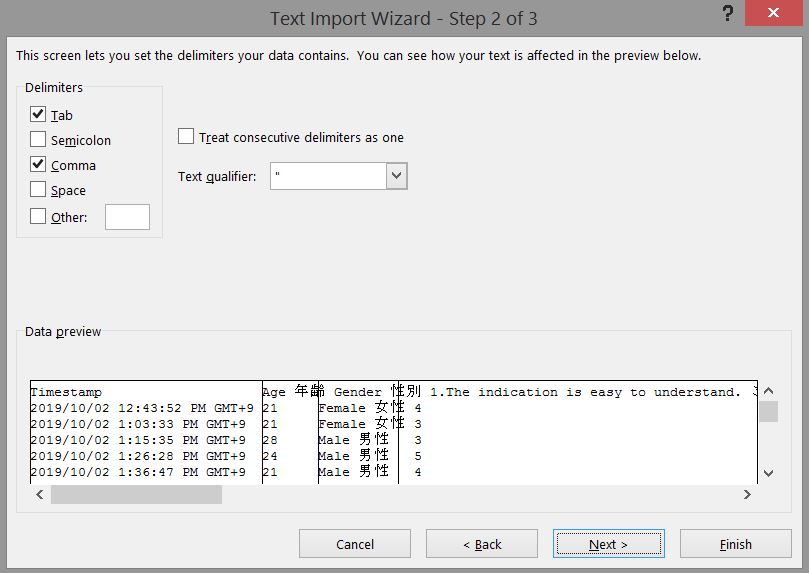
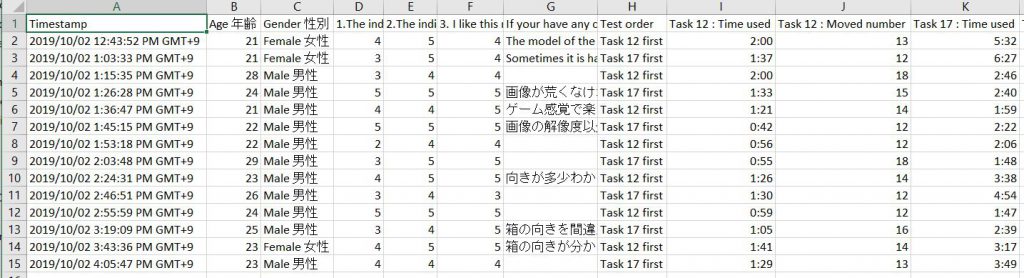
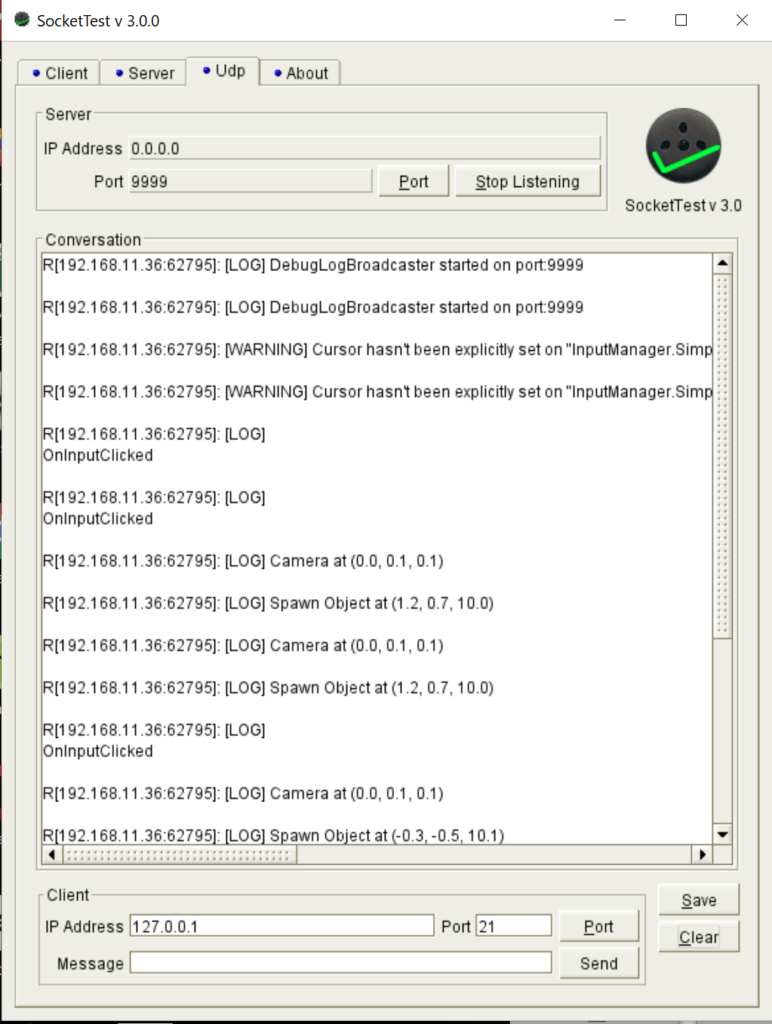
- Download SocketTest from http://sourceforge.net/projects/sockettest/ ,
extract file and open the program. Goto Udp tab, IP = 0.0.0.0, Port = 9999, Press “Start Listening”
2. Attach DebugLogBroadcaster.cs from the above blog to a gameobject, change Broadcast Port to 9999. (Any port number is fine. It only need to match the SocketTest program)
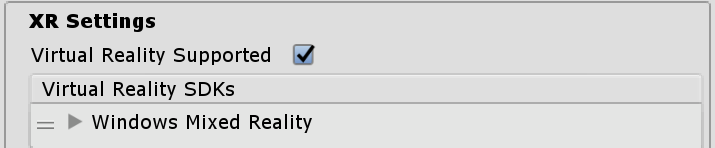
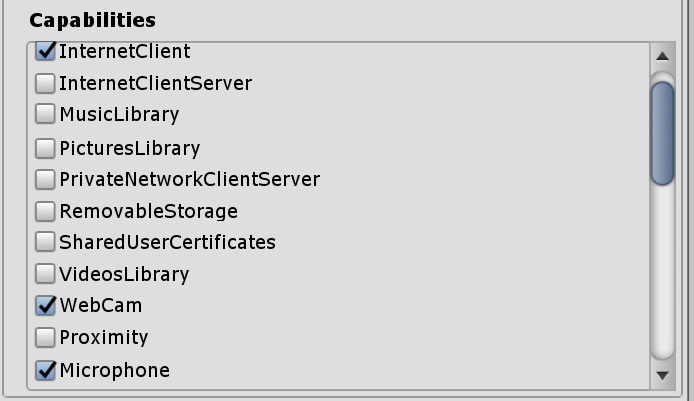
3. In Unity, Publishing Setting : enable the networking capabilities ( InternetClient, InternetClientServer and PrivateNetworkClientServer)
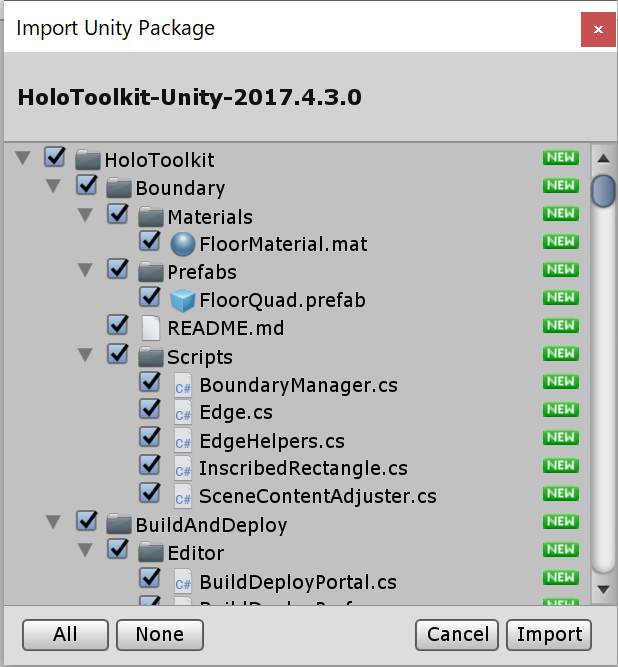
I’m gonna write a program to detect the airtap event to generate a new object in a room. To use Hololens interface -> import HoloToolkit 2017.4.3.0
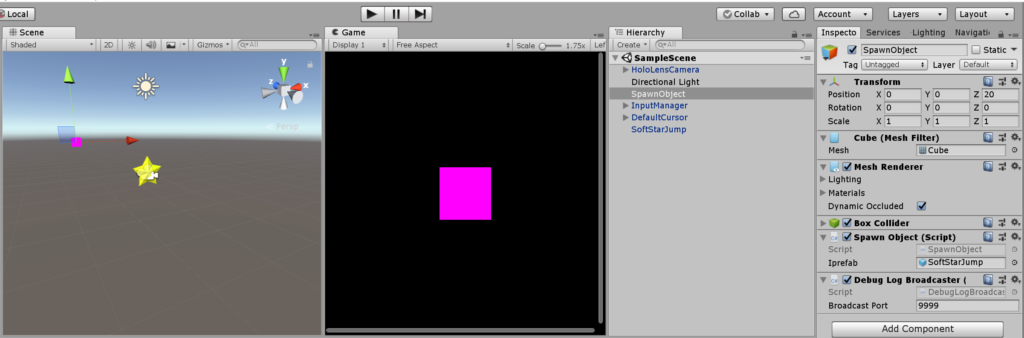
Hierarchy : Add HoloLensCamera, InputManager, DefaultCursor
The Yellow star prefab is from https://assetstore.unity.com/packages/3d/props/simple-gems-ultimate-animated-customizable-pack-73764
using System.Collections;
using System.Collections.Generic;
using UnityEngine;
using HoloToolkit.Unity.InputModule;
public class SpawnObject : MonoBehaviour, IInputClickHandler
{
public GameObject iprefab;
void Start ()
{
InputManager.Instance.PushFallbackInputHandler(gameObject);
}
public void OnInputClicked(InputClickedEventData eventData)
{
Debug.Log("\nOnInputClicked");
GameObject newobj = Instantiate(iprefab, new Vector3(0, 0, 0), Quaternion.Euler(-90, 0, 0));
newobj.transform.position = Camera.main.transform.position + Camera.main.transform.forward*10;
Debug.Log("Camera at " + Camera.main.transform.position);
Debug.Log("Spawn Object at " + newobj.transform.position);
}
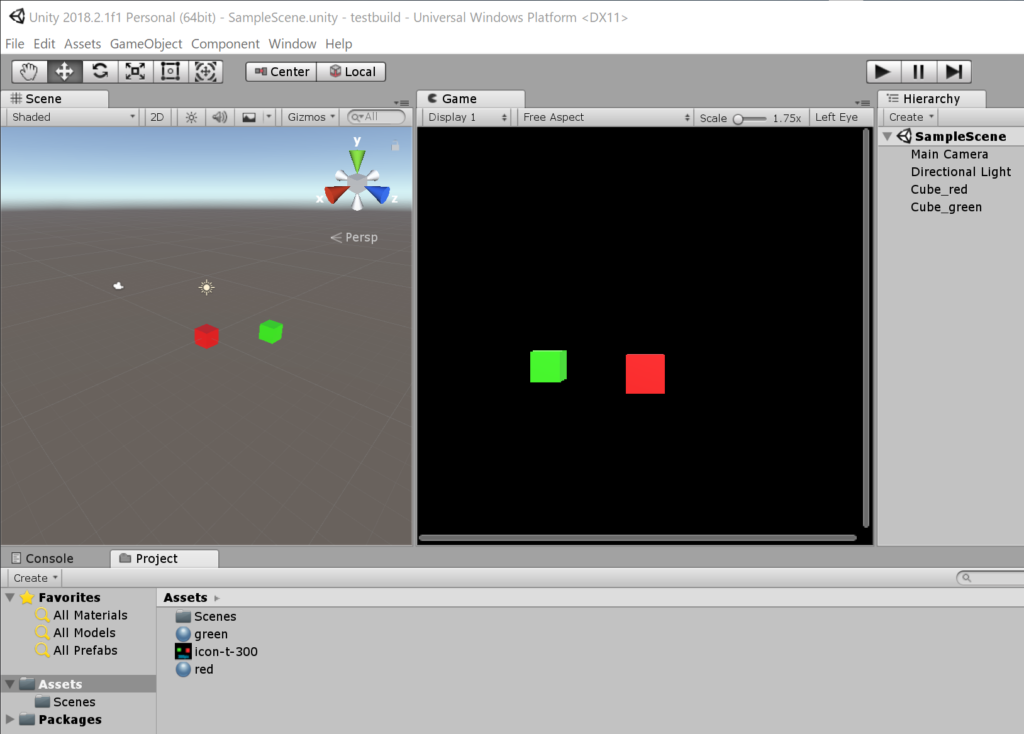
}Here is the result: We see a cursor which indicate the Hololens lookat position, when we do airtap, the programe will create a new star at the cursor position. Also the Debug.Log() can be observed by the SocketTest program.
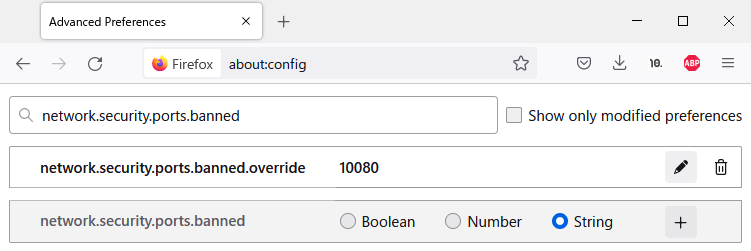
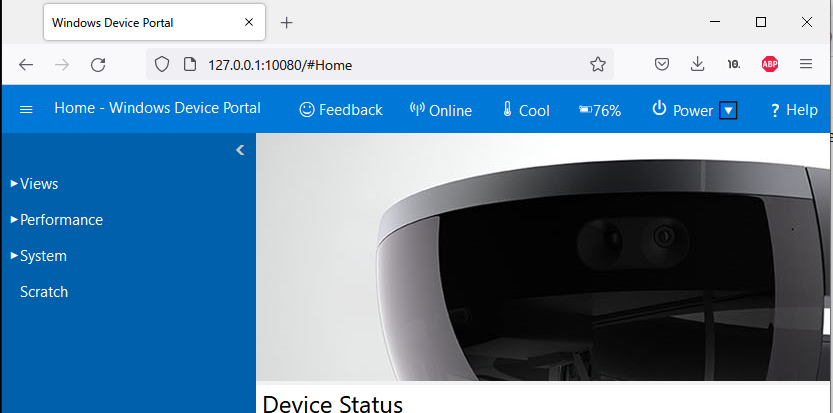


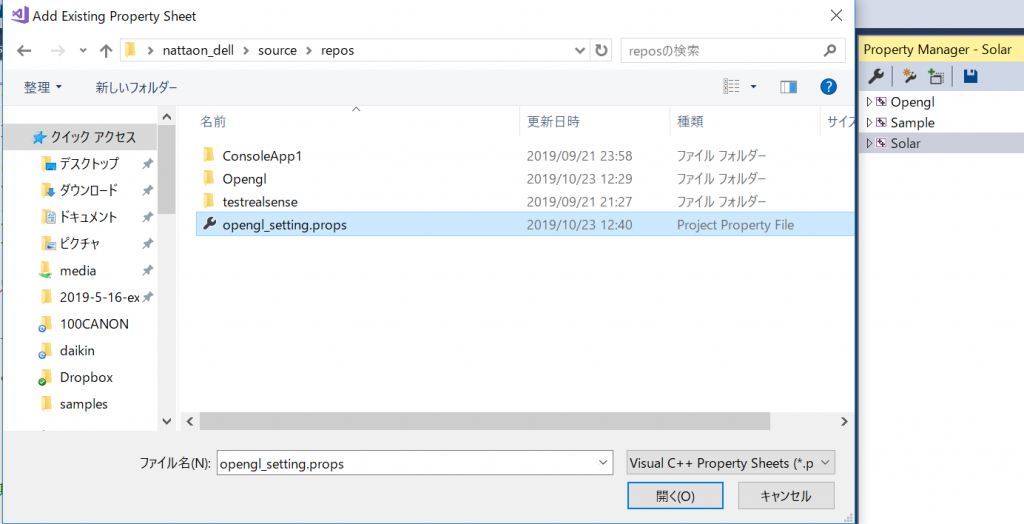
 <- open this one
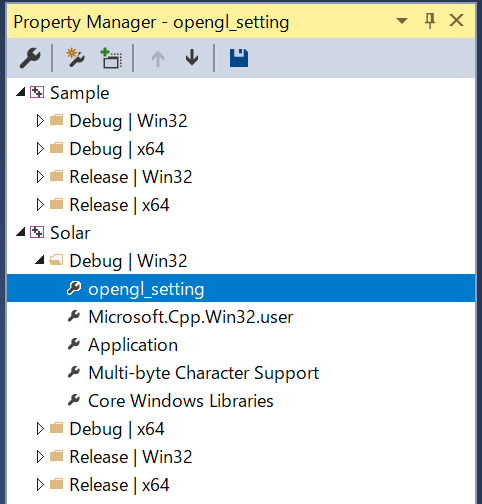